How to Update to SuperRack with ProLink Integration Support
Learn how to update SuperRack SoundGrid/Performer V14 to the latest version including support for the ProLink console remote integration protocol for DiGiCo and how to set it up.
Follow these steps to update SuperRack:
- Launch Waves Central and log in to your Waves account.
(If you do not have it installed yet, download Waves Central here). - The Updates Available button will appear at the top of the screen.

- Click the Updates Available button. All products for which updates are available will be selected and shown in the list on the right, including your application.
- When ready, click Update. This update only affects your software, not the license.
If you don’t see the ‘Updates Available’ button, you either require a fresh install, or you need to update your SuperRack SoundGrid/Performer license to V14, which you can do by following the instructions in this support article (If your application license is V13 or earlier section).
ProLink SuperRack DiGiCo integration is available starting from versions:
- SuperRack SoundGrid V14.30 (Legacy & ProLink)
- SuperRack Performer V14.30 (ProLink only, Windows only)
- DiGiCo console software V1742 (SD and Quantum series, Legacy & ProLink)
* ProLink requires a network cable to be connected between the console’s network port and the SuperRack host.
* SuperRack LiveBox is shipped with the ProLink compatible SuperRack Performer version.
* After applying the DiGiCo software update, the console will launch with Legacy console remote mode selected.
How to set up ProLink:
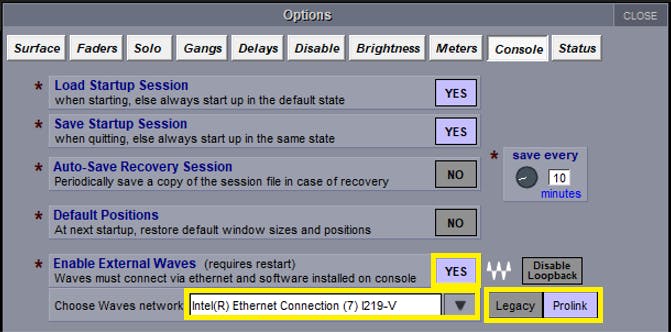
- On your DiGiCo, go to Options > Console.
- Make sure Enable External Waves is set to Yes and that the console network port is selected.
- The default selected mode is Legacy. Click on ProLink and power cycle the console.
- Launch SuperRack SoundGrid/Performer.
- In the Controllers pane, add ProLink Console Remote.
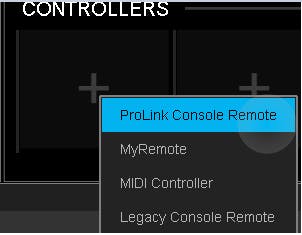
* SuperRack SoundGrid users: If you have previously used the console remote module, you will see Legacy Console Remote assigned in the Controllers pane. If that’s the case, you will first need to remove it, then assign ProLink Console Remote. - SuperRack SoundGrid: The correct network port is selected automatically. SuperRack Performer: Select the correct network port manually.
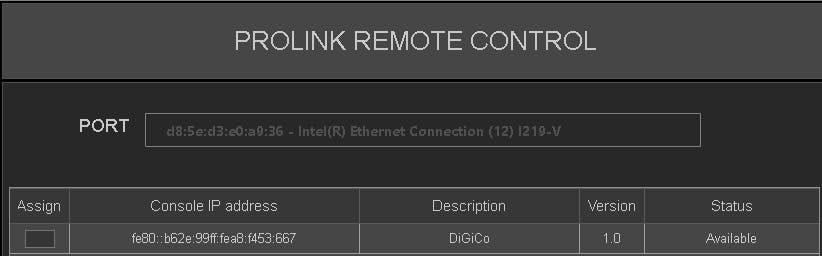
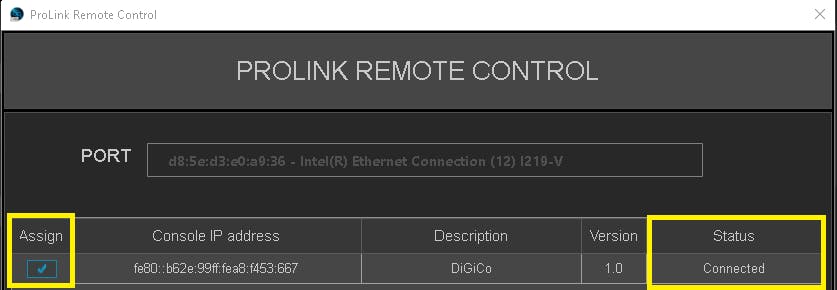
- Checkmark ‘Assign’ – status will change to ‘Connected’.
- A session load command will pass from the console to SuperRack. If there is no matching session in SuperRack’s integrated sessions folder, SuperRack will load an empty session.
SuperRack SoundGrid Integrated session folder location:- Windows: C:\Users\Public\Waves Audio\SuperRack SoundGrid\Integrated Sessions
- Mac: Mac HD > Users > Shared > Waves Audio > SuperRack SoundGrid > Integrated Sessions
- Windows: C:\Users\Public\Waves Audio\SuperRack Performer\Integrated Sessions
ProLink features added:
- Automated discovery
- Sync to console global tempo
- Console unattended mode sync with SuperRack
ProLink features available only in SuperRack SoundGrid:
- PFL/Solo function
To learn more about DiGiCo remote control integration features and console support, please refer to our DiGiCo Remote Control Integration and Mirroring article.
Need further assistance? Contact Technical Support.

Life is sweeter
with cookies...
We use cookies to give the best
possible experience when using our website